Learn with SHAKTI
Using Arty-7 100T with SHAKTI
STEP 1: Prerequisites
Note: Please ensure SHAKTI C Class is programmed onto the Arty-7 100t board
1. Install the required packages.
sudo apt-get install python-serial
If you face any error while running any command, Please refer FAQ section.
2. Please ensure SHAKTI toolchain is installed successfully.
which riscv64-unknown-elf-gcc
which openocd
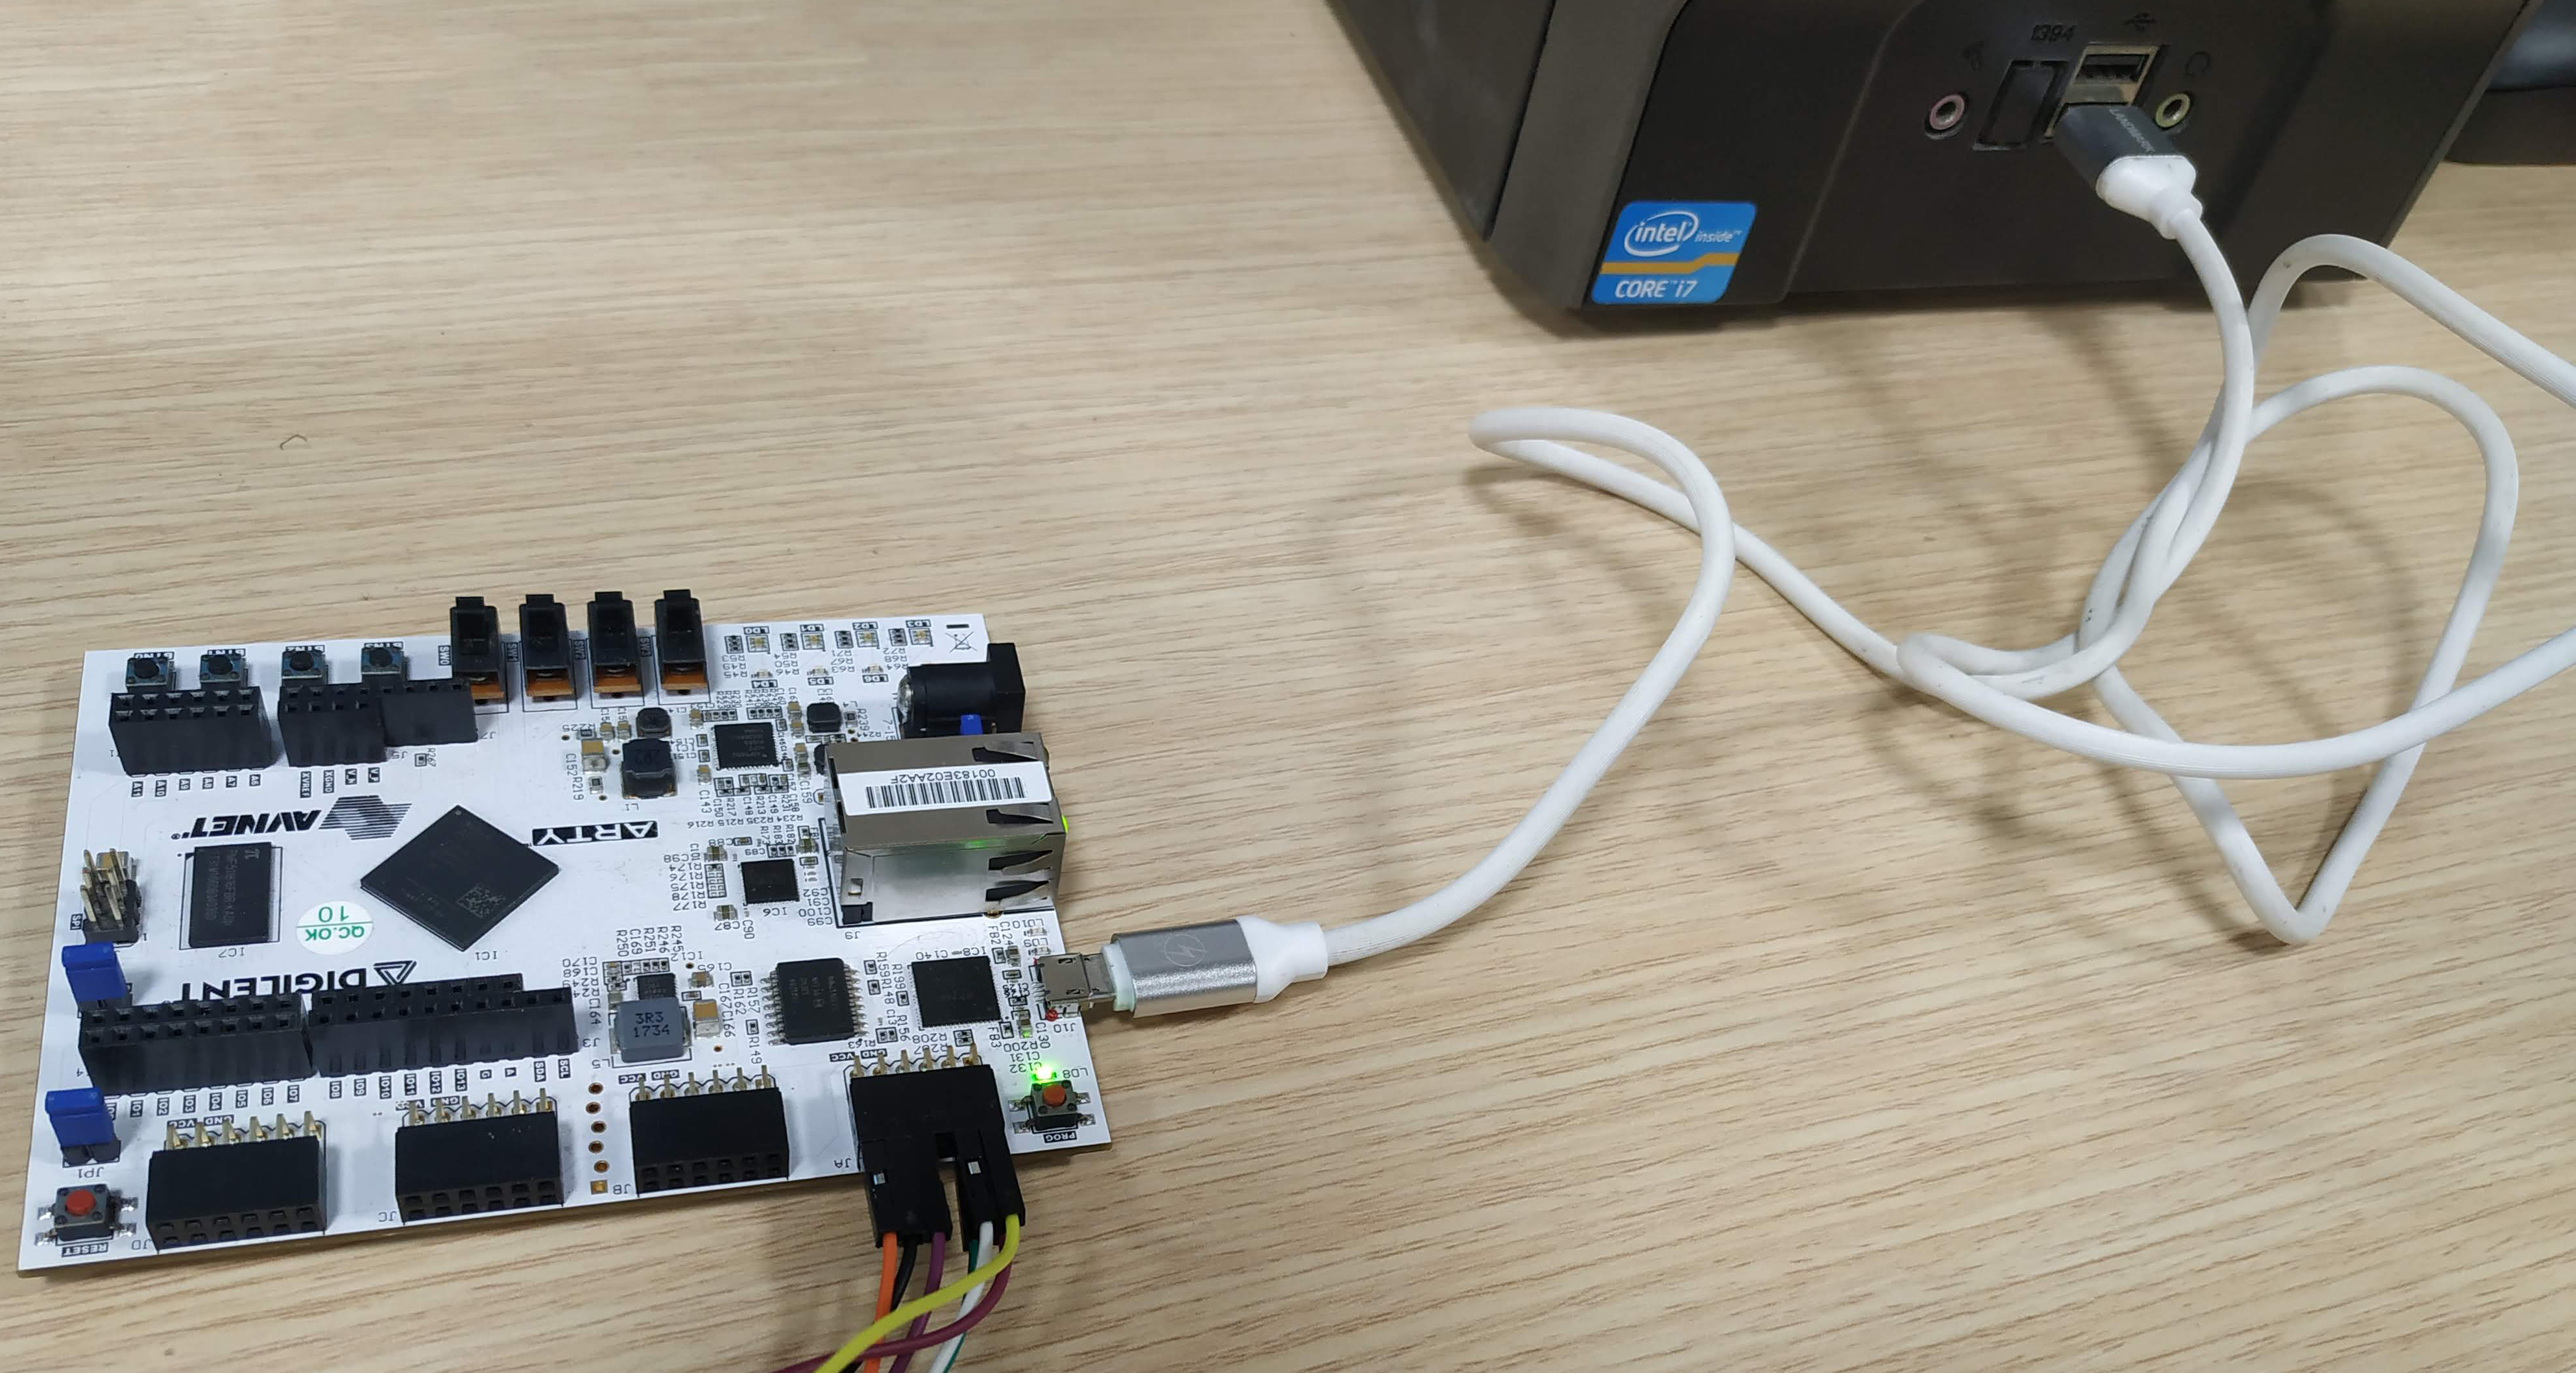
3. Please connect Arty-7 100t board to the system using the microUSB cable.
STEP 2: Compile and Build
1. Move inside the spiking folder and update it.
cd spiking
git pull
2. In the spiking folder, Run the below command to compile example.S for SHAKTI. example.S is the assembly file created in earlier Compile and Build section.
riscv64-unknown-elf-gcc -nostdlib -nostartfiles -T link.ld example.S -o example.elf
/home/username/shakti-tools/bin/../lib/gcc/riscv64-unknown-elf/7.2.0/../../../../riscv64-unknown-elf/bin/ld:
warning: cannot find entry symbol _start; defaulting to 0000000080000000
STEP 3: Debugging
The Arty-7 100T board is programmed with SHAKTI C class SoC. Please ensure Arty-7 100T board is connected to the the Host PC.
- The Arty-7 100T board should be attached to the OpenOCD debugger, in order to debug your program using the RISC-V GNU Debugger (GDB) software. Read how RISC-V GDB and OpenOCD work together to establish a connection between the Microprocessor and Host PC.
- Since we have built the application, already. We can straight away load it to the Arty-7 100T board and test.
sudo miniterm.py /dev/ttyUSB0 19200
--- Miniterm on /dev/ttyUSB0  19200,8,N,1 ---
--- Quit: Ctrl+] | Menu: Ctrl+T | Help: Ctrl+T followed by Ctrl+H ---
Note: "/dev/ttyUSB0" - ttyUSB means "USB serial port adapter" and the "0" ( "0" or "1" or "2") is the USB device number to which the board is connected and 19200 is the default baud rate.
sudo $(which openocd) -f ftdi.cfg
[sudo] password for rise:
Open On-Chip Debugger 0.10.0+dev-00615-gfd9c54b (2019-07-12-15:10) Licensed under GNU GPL v2 For bug reports, read http://openocd.org/doc/doxygen/bugs.html adapter speed: 1000 kHz none separate Info : auto-selecting first available session transport "jtag". To override use 'transport select'. Info : Simple Register based Bscan Tunnel Selected Info : clock speed 1000 kHz Info : JTAG tap: riscv.cpu tap/device found: 0x13631093 (mfg: 0x049 (Xilinx), part: 0x3631, ver: 0x1) Info : datacount=12 progbufsize=0 Warn : We won't be able to execute fence instructions on this target. Memory may not always appear consistent. (progbufsize=0, impebreak=0) Info : Examined RISC-V core; found 1 harts Info : hart 0: XLEN=64, misa=0x800000000014112d Info : Listening on port 3333 for gdb connections Info : Listening on port 6666 for tcl connections Info : Listening on port 4444 for telnet connections Info : accepting 'gdb' connection on tcp/3333
Also, Learn how to debug an ASM program using objdump and RISC-V GDB!
riscv64-unknown-elf-gdb
GNU gdb (GDB) 9.1
Copyright (C) 2020 Free Software Foundation, Inc.
License GPLv3+: GNU GPL version 3 or later < http://gnu.org/licenses/gpl.html>
This is free software: you are free to change and redistribute it.
There is NO WARRANTY, to the extent permitted by law.
Type "show copying" and "show warranty" for details.
This GDB was configured as "--host=x86_64-pc-linux-gnu --target=riscv64-unknown-elf".
Type "show configuration" for configuration details.
For bug reporting instructions, please see:
< http://www.gnu.org/software/gdb/bugs/>.
Find the GDB manual and other documentation resources online at:
    < http://www.gnu.org/software/gdb/documentation/>.

For help, type "help".
Type "apropos word" to search for commands related to "word".
(gdb) target remote localhost:3333
Remote debugging using localhost:3333 warning: No executable has been specified and target does not support determining executable automatically. Try using the "file" command. Python Exception'gdb.Inferior' object has no attribute 'progspace': 0x0000000000000008 in ?? ()
(gdb) file example.elf
A program is being debugged already.
Are you sure you want to change the file? (y or n) y
Reading symbols from example.elf...(no debugging symbols found)...done.
(gdb) load
Loading section .text, size 0x44 lma 0x80000000
Loading section .data, size 0x10 lma 0x80000044
Start address 0x80000000, load size 84
Transfer rate: 11 KB/sec, 42 bytes/write.
(gdb) info reg pc
pc 0x0000000080000000 2147483648
(gdb) b loop
Python Exception'gdb.Inferior' object has no attribute 'progspace': Breakpoint 1 at 0x8000002e
(gdb) c
Continuing. Breakpoint 1, Python Exception'gdb.Inferior' object has no attribute 'progspace': 0x000000008000002e in loop ()
(gdb) info reg
ra             0x0000000000000000 0
sp             0x0000000000000000 0
gp             0x0000000000000000 0
tp             0x0000000000000000 0
t0             0x0000000000000000 0
t1             0x0000000000000000 0
t2             0x0000000000000000 0
fp             0x0000000000000000 0
s1             0x0000000000000000 0
a0             0x0000000000000001 1
a1             0x0000000000000000 0
a2             0x000000000000000e 14
a3             0x0000000000000000 0
a4             0x0000000000000000 0
a5             0x0000000080000044 2147483716
a6             0x0000000000000007 7
a7             0x0000000000000010 16
s2             0x0000000000000000 0
s3             0x0000000000000000 0
s4             0x0000000000000000 0
s5             0x0000000000000000 0
s6             0x0000000000000000 0
s7             0x0000000000000000 0
s8             0x0000000000000000 0
s9             0x0000000000000000 0
s10            0x0000000000000000 0
s11            0x0000000000000000 0
t3             0x0000000000000000 0
t4             0x0000000000000000 0